⚙️ Settings
Settings is where you look after your account details, decide what EQUOS tells you about, point your printing at the right place, and bring your business data in and out. This page will guide you through each area and what changing it affects.
Like the Dashboard, Settings is always available on every plan. Open it from the bottom of the navigation rail. Your account card sits up top, and below it your areas are grouped under "Account", "Data", "Appearance" and "Layout".
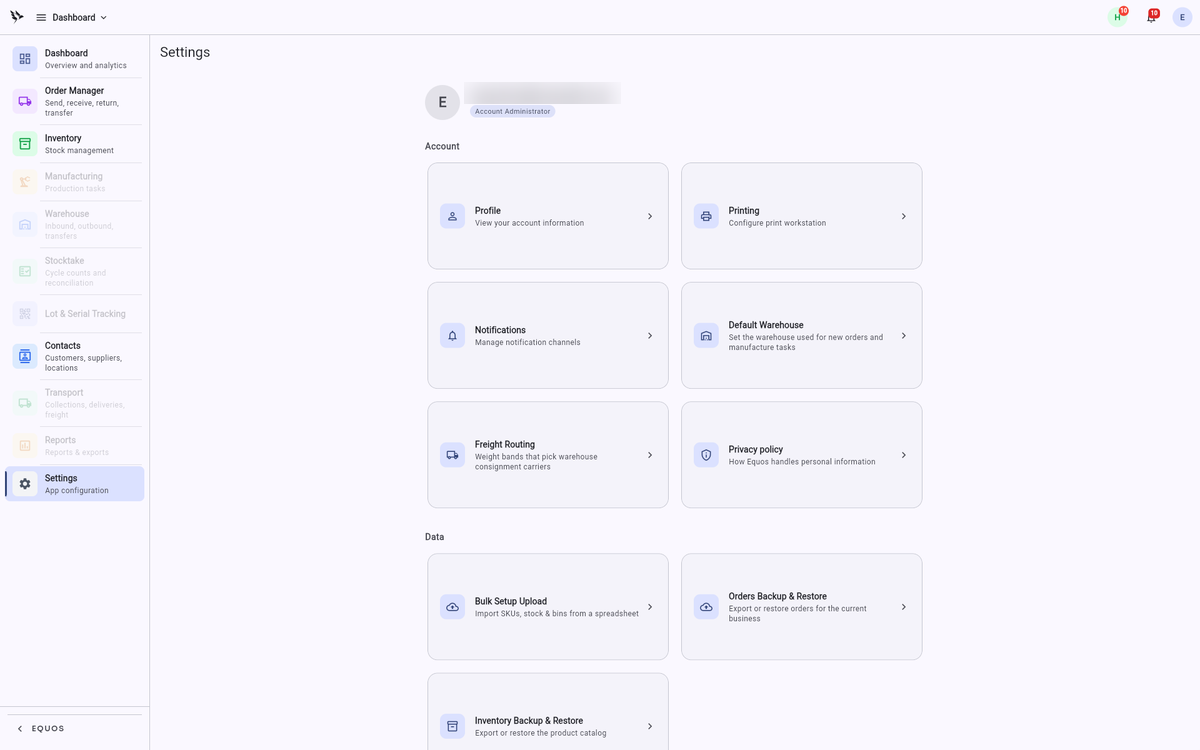 The Settings home: your account card up top, then the Account and Data sections.
Account holds your Profile, Printing and Notifications, and Data holds the tools for bringing your business in and keeping a copy safe — Bulk Setup Upload, Orders Backup & Restore, and Inventory Backup & Restore. Below those, Appearance sets the theme and Layout tailors your Order and Contact screens. Simply select a card to open that area. Your subscription, plan and staff access are not here — those live in the Console.
Your profile
The Profile area shows the account you are signed in as. Open it from the "Profile" card under Account.
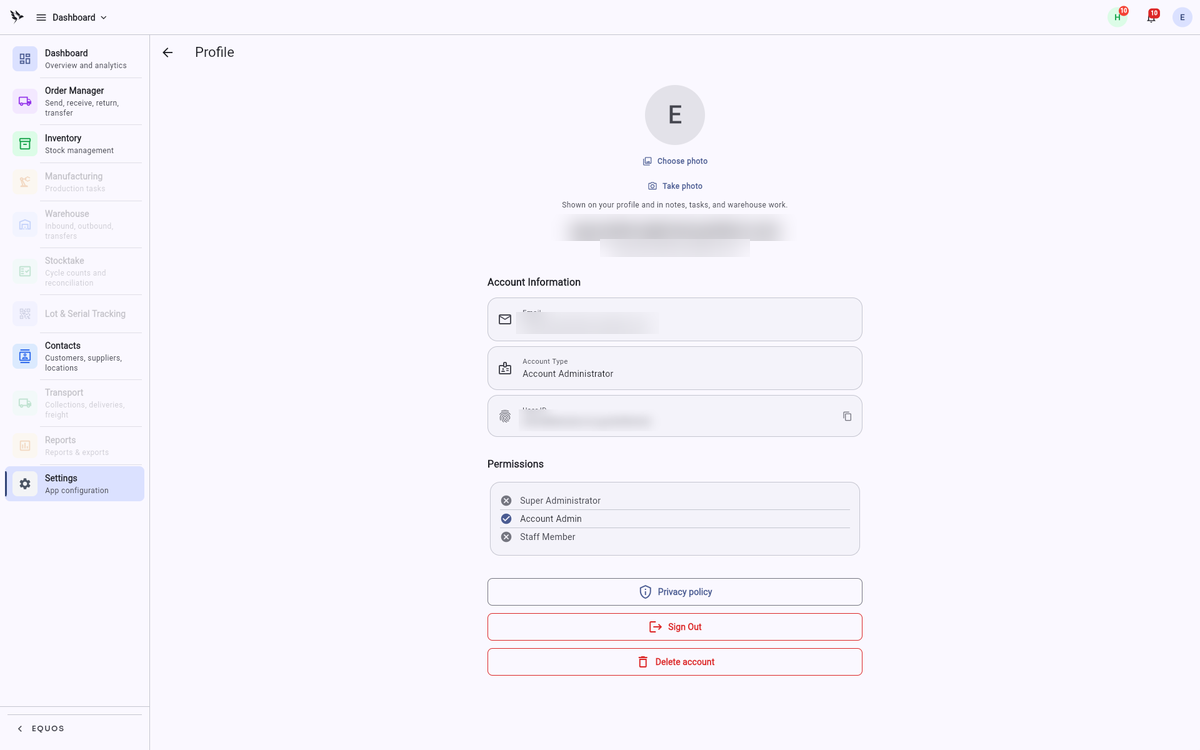 The Profile screen, showing your account information and permissions.
Under Account Information you can see, at a glance:
- Email — the address your account signs in with.
- Account Type — your role, such as Super Admin, which sets what you are allowed to do across the app.
- User ID — your unique identifier. Simply press the copy icon beside it to copy it to your clipboard. This one is worth knowing, because it is exactly what you enter when setting up printing on a shared workstation.
Below that, the Permissions card lists your access levels — Super Administrator, Account Admin and Staff Member — each with a tick or a cross so you always know the reach of the account you are using. This ensures everyone can confirm who they are signed in as and what that account is entitled to do.
At the bottom sits Sign Out, which signs this device out of EQUOS.
The Profile screen is read-only — you can view your role here, but you cannot change your own permissions or manage other people from it. Adding teammates, changing their roles and removing access all happen in the Console. See Team & Access.
Notification preferences
Notifications keep you posted as work moves through EQUOS. The Notifications area lets you choose which of those you want to see, so the important ones aren't lost in the noise. Open it from the "Notifications" card. Your choices save the moment you flick a switch, and they apply to your account on every device.
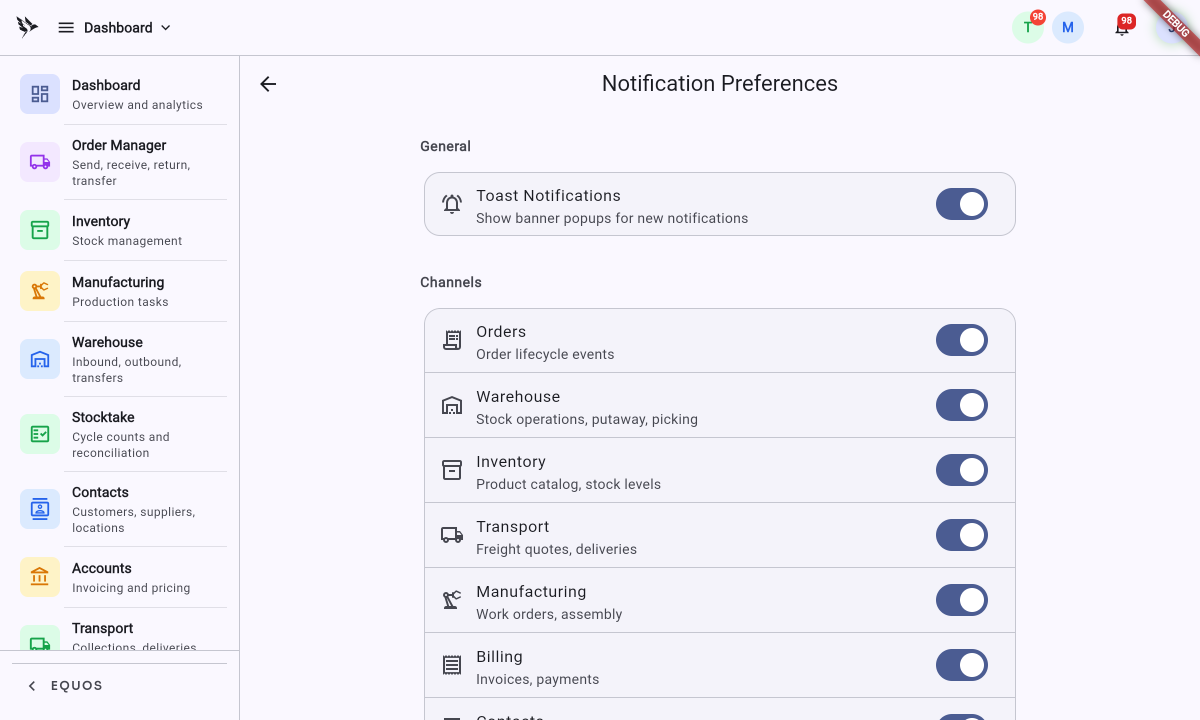 Notification Preferences: the master toast toggle, then a switch for each channel.
- Toast Notifications — the master switch under "General". Leave it on to get the banner pop-ups that appear when something new happens; turn it off for a quieter screen. With this off, no channel pops a banner.
- Channels — under "Channels", a switch for each part of the app: Orders (order lifecycle events), Warehouse (stock operations, putaway and picking), Inventory (product catalogue and stock levels), Transport (freight quotes and deliveries), Manufacturing (production tasks and assembly), Billing (invoices and payments), Contacts (contact changes and imports), system alerts, and more — the list simply shows every notification type available to your account. Flick a channel off and you simply stop hearing about that area, while the rest carry on as normal.
This allows each person to tune EQUOS to their own job — the packer can follow Warehouse while the office follows Orders — so notifications stay useful instead of becoming background hum.
Printing
The Printing area tells EQUOS where to send your print jobs, such as labels and the PDFs you generate from Reports. Open it from the "Printing" card.
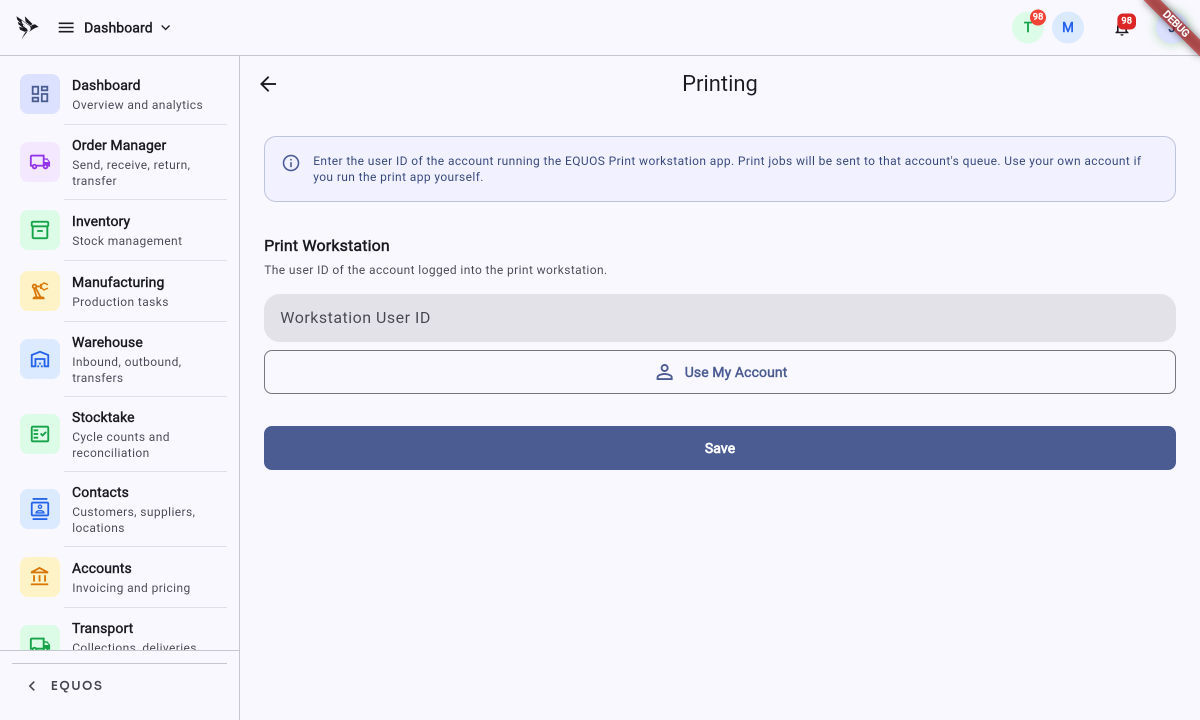 Printing: point your print jobs at the workstation running the EQUOS Print companion.
Printing in EQUOS works through a Print Workstation — a computer running the EQUOS Print companion app that receives jobs and sends them to the physical printer. You point your account at that workstation by entering the User ID of the account it is signed in as. Print jobs are then delivered to that account's queue, and the companion prints them.
- Enter the User ID of the account logged into the print workstation in the "Workstation User ID" field.
- If you run the companion on your own machine, simply press "Use My Account" to fill your own ID in. (Your User ID is on your Profile screen.)
- Press "Save". EQUOS then checks that a companion is registered for that ID and tells you which workstation it connected to. If nothing is registered yet, it saves the ID and reminds you to open the EQUOS Print companion on that account so it can register itself.
- To stop routing your jobs there, clear the field and press "Save" again.
This ensures a label or document you send to print lands at the right printer, rather than disappearing into the wrong queue.
The Data section
Below Account sits the Data section, which holds the tools for getting your business into EQUOS in bulk and keeping a copy of your records safe. Each opens its own screen.
Bulk Setup Upload
Bulk Setup Upload is the quickest way to stand up a new warehouse from a spreadsheet — it reads one CSV and creates your SKUs (product codes), their stock levels and their bins (storage locations) in a single pass. Open it from the "Bulk Setup Upload" card.
Before you start, select the business and the warehouse you are loading into from the app bar. The upload writes into whichever warehouse is selected, so getting this right first ensures your stock and bins land in the right place. If either is missing, EQUOS will ask you to choose before it runs.
Your spreadsheet needs, at minimum, a column for SKU, one for Product Name and one for Bin Location; a Quantity column is optional. The wizard then walks you through, step by step:
- Pick file — choose your CSV. EQUOS reads it and has a first go at matching your columns to its fields.
- Map columns — check that match, and simply adjust any column that landed on the wrong field. You cannot move on until SKU, Product Name and Bin Location are all mapped.
- Verify data — a chance to eyeball and tidy the rows before anything is created.
- Product types — group your SKUs by the start of their code (for example, everything beginning "RAW-" as one type), so like products are set up together.
- Bin positions — tell EQUOS how to read your bin codes by choosing the separator and what each part means (zone, bay, position). This is what gives every item an address in the warehouse.
- Preview — EQUOS shows exactly what it will create and flags anything blocking. Fix any blockers, then start the import.
- Execute & complete — the wizard runs with a live progress bar and reports what it created at the end.
Bulk Setup Upload creates new products, stock and bins in the selected warehouse. Load into the right business and warehouse, and check the Preview step before you start — it is far easier to get the file right than to unpick a bulk import afterwards.
Orders Backup & Restore
This area takes a copy of your orders and puts them back if you ever need to. It always works against the business shown at the top of the screen, so select the business you want from the app bar first.
Backing up downloads two CSV files — your orders (with their line items, quality-check timestamps and created/modified dates) and the contacts those orders reference. Two switches decide the scope:
- Include open orders — on by default.
- Include archived orders — off by default.
Choose at least one, then press "Download Backup".
Restoring opens the orders import flow and reads a backup file back in. A few things are worth knowing before you do:
- New contacts and SKUs found in the file are flagged, not created — nothing new is added unless you select and confirm each one.
- Orders link to products by SKU code, matched against this business's catalogue.
- Quality-check metrics and the original timestamps are kept in the backup for your records only; they are not written back.
- An order whose contact or SKU can't be matched is skipped, or brought in without the lines it couldn't resolve.
A "Download restore template" button gives you a correctly-shaped starter file if you would rather build one by hand.
Inventory Backup & Restore
This area does the same for your product catalogue. Like orders, it works against the business shown at the top, so pick the right one first.
Backing up downloads a maintenance CSV that carries the internal Item ID and Variant ID columns alongside your SKUs, stock levels, variants and composite components. A single switch, Include inactive items (on by default), decides whether archived products come along.
Restoring offers two paths, and choosing the right one matters:
- Apply maintenance backup — matches rows by Item ID / Variant ID and only updates items that already exist. Nothing new is created. Use this to repair the same business from a backup you exported here.
- Import / restore catalog — matches by SKU and will create new items or update existing ones. Use this when restoring into a fresh business or migrating from another.
Reserved and on-order quantities in the backup file are read-only, so restoring never disturbs live order state.
Restoring writes records back into your account. A maintenance restore only ever updates matching items, but a catalogue import can create new ones — so make sure you have the right business selected and the right file to hand. When in doubt, take a fresh backup first.
Appearance
The Appearance section is where you set how EQUOS looks on this device. Under "Theme", simply choose one of three options:
- System — follow whatever your device is set to, and switch along with it.
- Light — a light background at all times.
- Dark — a dark background at all times.
The change applies the moment you pick it, and it is remembered on this device. This ensures the app stays comfortable to read whether you are in a bright office or a dim loading dock.
Layout
The Layout section lets you tailor how two of the busier screens are arranged, so each person sees the detail that matters to them first. Two cards each open their own editor:
- Order View — customise the order detail screen. Simply drag sections into the order you want, move them between the left and right panes (or between tabs on mobile), show or hide sections with the chips, and set how wide each pane sits.
- Contact View — customise the contact detail screen. Drag the tabs into your preferred order, and switch any of them on or off.
Each editor has a "Reset" in its top corner that restores the default arrangement. Note that pressing "Reset" discards your customisations for that screen, so reach for it only when you want to start fresh.
What Settings doesn't do
Settings looks after your account and your data — it isn't your billing desk or your staff roster.
- Your subscription, plan and payment are managed from the Console, not here.
- Adding people, setting their roles and removing access all live in the Console under Team & Access — the Profile screen only shows the account you are signed in as.
What's next
- New to the platform? Start with Getting Started to find your way around.
- Setting up a warehouse? Bulk Setup Upload pairs naturally with the Storage & Bins guide.
- Managing who can do what? Head to Team & Access in the Console.