🏢 Business Setup
The setup wizard creates a new business in equosBooks and seeds it with a chart of accounts tailored to how you operate. This page will guide you through the wizard's four steps, from your business details through to branding.
To start, open the Businesses page and press "+ Standalone" to create an independent business. If you are building a group of companies, press "+ Holding Company" instead — more on entity types below.
The wizard has four steps: Details, Tax & Compliance, Chart of Accounts, and Branding. You move through them with "Next" and "Back", and finish with "Create Business". Every setting can be changed later, so you can simply make sensible choices now and refine them as you go.
Step 1: Details
Enter your business information:
- Business Name — your registered or trading name (required)
- Entity Type — Standalone, Holding Company, or Subsidiary
- Parent Company — only for a Subsidiary; choose which entity owns it
- ABN — your Australian Business Number
- Address, Phone, and Email — used on your invoices and documents
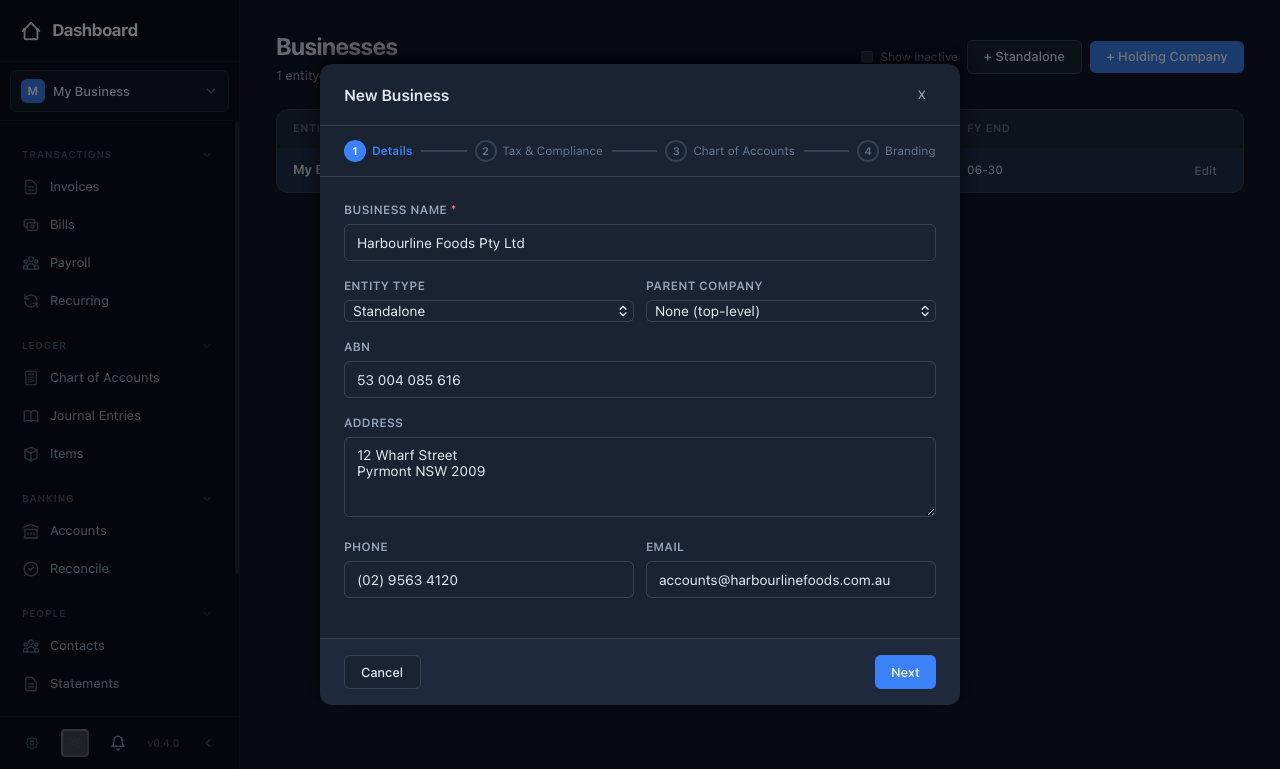 Step 1 of the setup wizard, where you enter your business name, entity type, ABN, and contact details.
Entity types
Most businesses are Standalone. If you run a group, a Holding Company owns one or more Subsidiary entities, each with its own books. This lets you keep every entity separate while still reporting on the group as a whole. This is covered in Consolidation.
Press "Next" to continue.
Step 2: Tax & Compliance
Configure how your business is taxed and structured:
- Currency and Fiscal Year End — AUD and 30 June are the Australian defaults
- Business Structure — Sole Trader, Company, Trust, or Partnership, which sets the right equity accounts
- GST — tick "Registered for GST" to record your BAS period (Quarterly or Monthly) and options such as export sales, input-taxed supplies, and capital purchases
- Payroll — tick "Will pay employees" if you pay wages, with an extra option for Fringe Benefits Tax (FBT)
- Inventory — tick if you track physical stock
- TPAR — tick if you must lodge a Taxable Payments Annual Report
Your answers here decide which accounts are added in the next step. This ensures your chart of accounts only carries the accounts your business actually needs.
Step 3: Chart of Accounts
Choose an industry template to seed a tailored chart of accounts. The available templates are:
- General
- Professional Services
- Retail & E-Commerce
- Trades & Construction
- Hospitality
- Property & Real Estate
- Not-for-Profit
- Medical & Health
- Rental Property
Each template card shows a short description and how many accounts it includes. When you pick one, a preview lists every account it will create. You can untick any account you do not need before finishing — a few essential accounts are locked because the app's posting logic relies on them. You can always add, rename, or deactivate accounts later from the Chart of Accounts page.
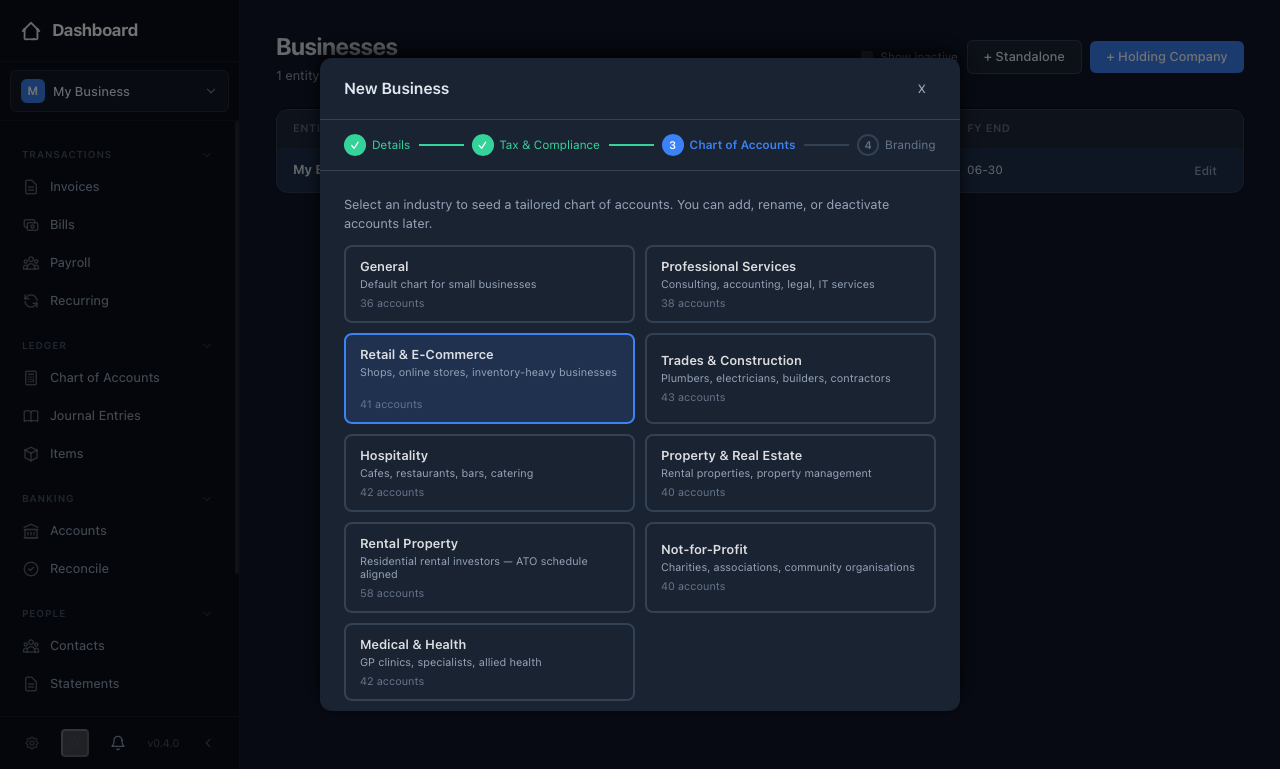 In Step 3 you pick an industry template, and each card shows how many accounts it will create for you.
Step 4: Branding
The Branding step is optional and controls how your invoices and reports look. You can set:
- Brand Color — the accent colour used on your documents
- Header Text — for example, "Tax Invoice" and your ABN details
- Bank Details — your BSB, account number, and bank, shown for payment
- Footer Text — a closing line such as "Thank you for your business"
You can change any of these later in business settings, so feel free to leave them blank for now.
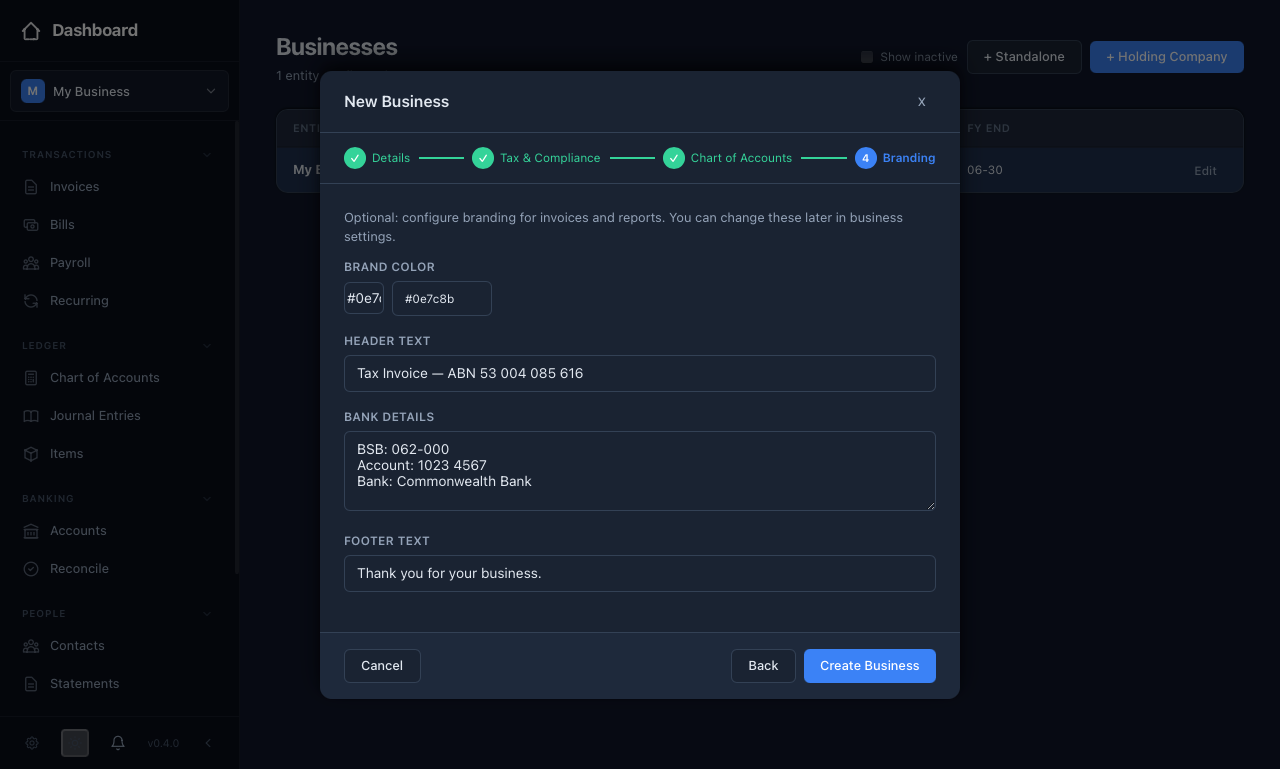 Step 4 sets the brand colour, header, bank details, and footer shown on your invoices and reports — you can leave it blank and change it later.
Creating the business
Press "Create Business" to finish. equosBooks builds your chart of accounts from the template you chose and returns you to the Businesses page, where your new business appears in the list ready to open.
Next steps
- Chart of Accounts — Review and customise the accounts your template created
- Contacts — Add your customers and suppliers
- Invoices — Create your first invoice