📤 Orders
An order is the record of something promised — either a sale going out or a purchase coming in. This page will guide you through the Order Manager, creating orders, moving them through your stages, importing in bulk, and keeping your list tidy.
Every order in EQUOS carries three things from the moment it exists: a status, an owner, and a path forward. Sales orders and purchase orders both live in the one place, so you always know where a job stands without asking around.
The order manager holds no monetary values. It deals with the logistics of an order — what, how much, and where it is in the process — while prices, line totals, and anything to do with money live with Invoicing.
The Order Manager dashboard
The Order Manager is your home base for everything moving in and out. Open it and you land on a summary of the whole operation.
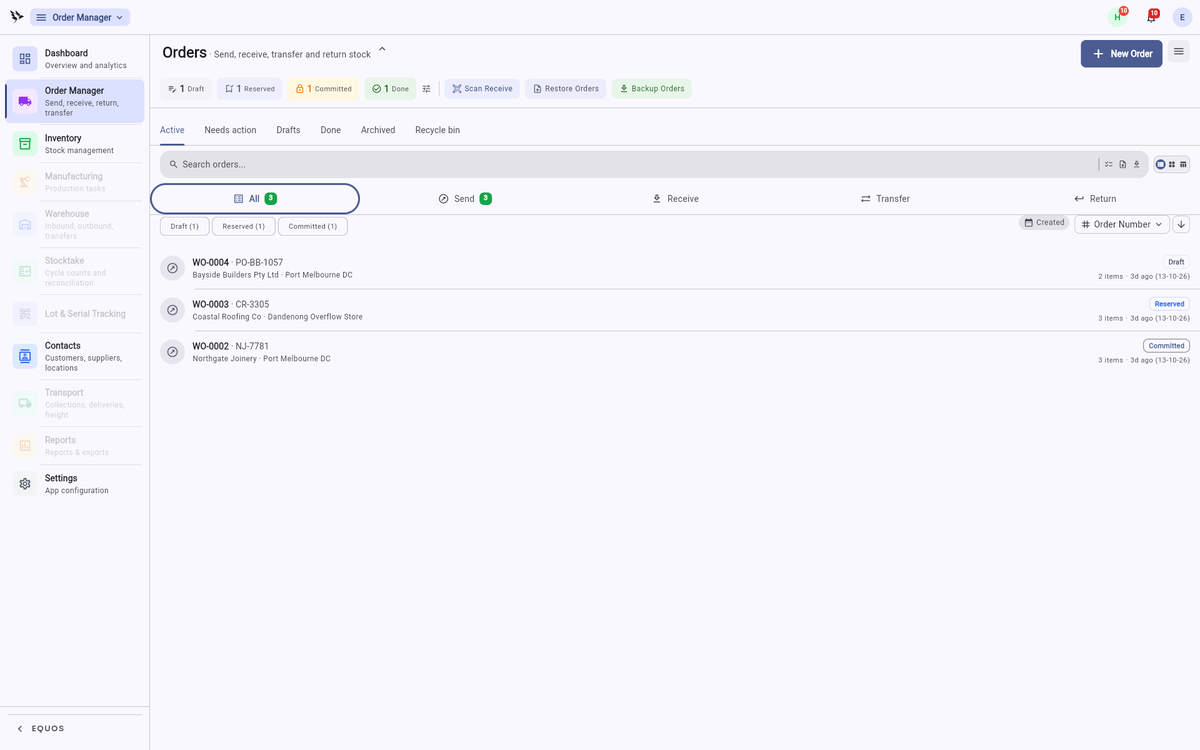 The Order Manager dashboard, with counts for each order type and your orders grouped by customer.
- The four tiles across the top count your orders by type: "Send", "Receive", "Transfer" and "Return".
- Below them sit the quick actions — "Scan Receive", "Import Orders" and "Export Orders" — and a search box for finding any order fast.
- Your orders are grouped by customer, each card showing its order number, type, status, quantity and due date. Press "View All Orders" on a group to open just that customer's jobs.
This ensures you can see how the whole operation is tracking in one glance, without building a report first.
Creating an order
When a customer says yes — or you need to buy stock in — you simply press "New Order" and pick which of the four types you are raising.
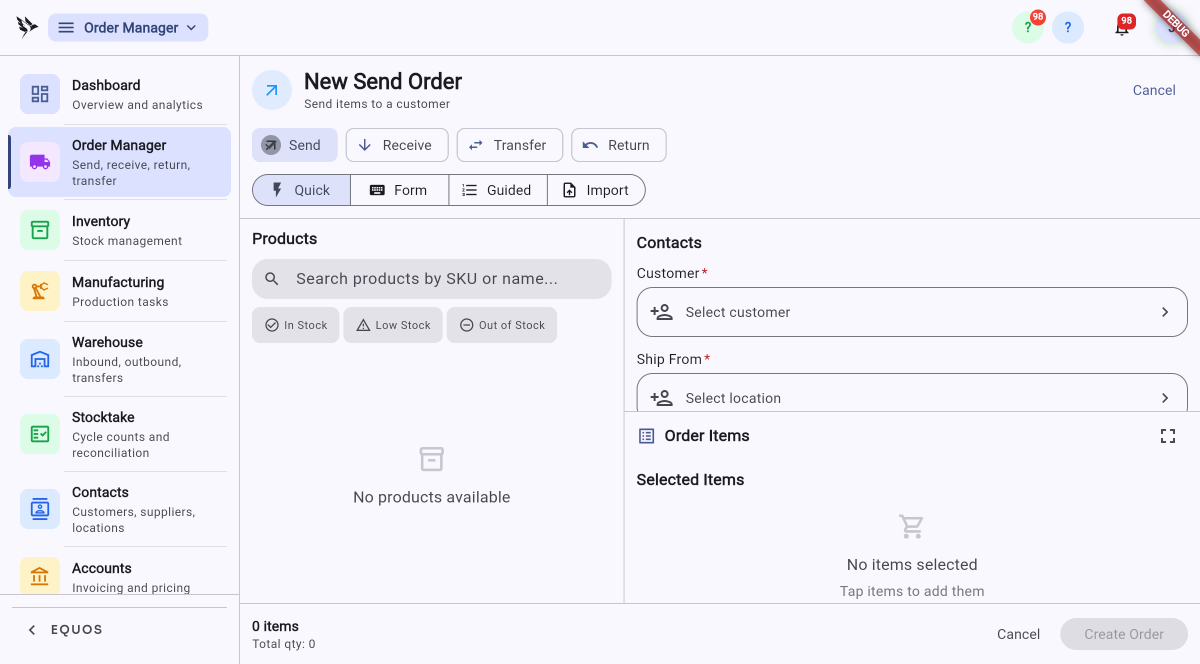 The New Send Order screen, with the type toggle, entry modes, product search and contact panels.
- Choose "Send", "Receive", "Transfer" or "Return" at the top of the screen. A Send order ships stock out to a customer; a Receive order brings stock in from a supplier.
- Pick how you want to build the order with the mode toggle: "Quick" for a fast cart, "Form" for the full fields, "Guided" for a step-by-step, or "Import" to pull it from a file.
- Search "Products" by SKU or name and tap each item to drop it into the cart. The "In Stock", "Low Stock" and "Out of Stock" filters help you pick from what is actually on hand.
- Select the "Customer" and the "Ship From" location on the right. Their details are pulled straight from your directory, so there is nothing to re-type.
- When the cart is right, press "Create Order".
The order now sits at the first stage of your process with a clear status. This ensures anyone who opens it can see exactly what was promised and who is looking after it.
Moving an order forward
Orders progress through stages, and each step triggers the next without you wiring anything together.
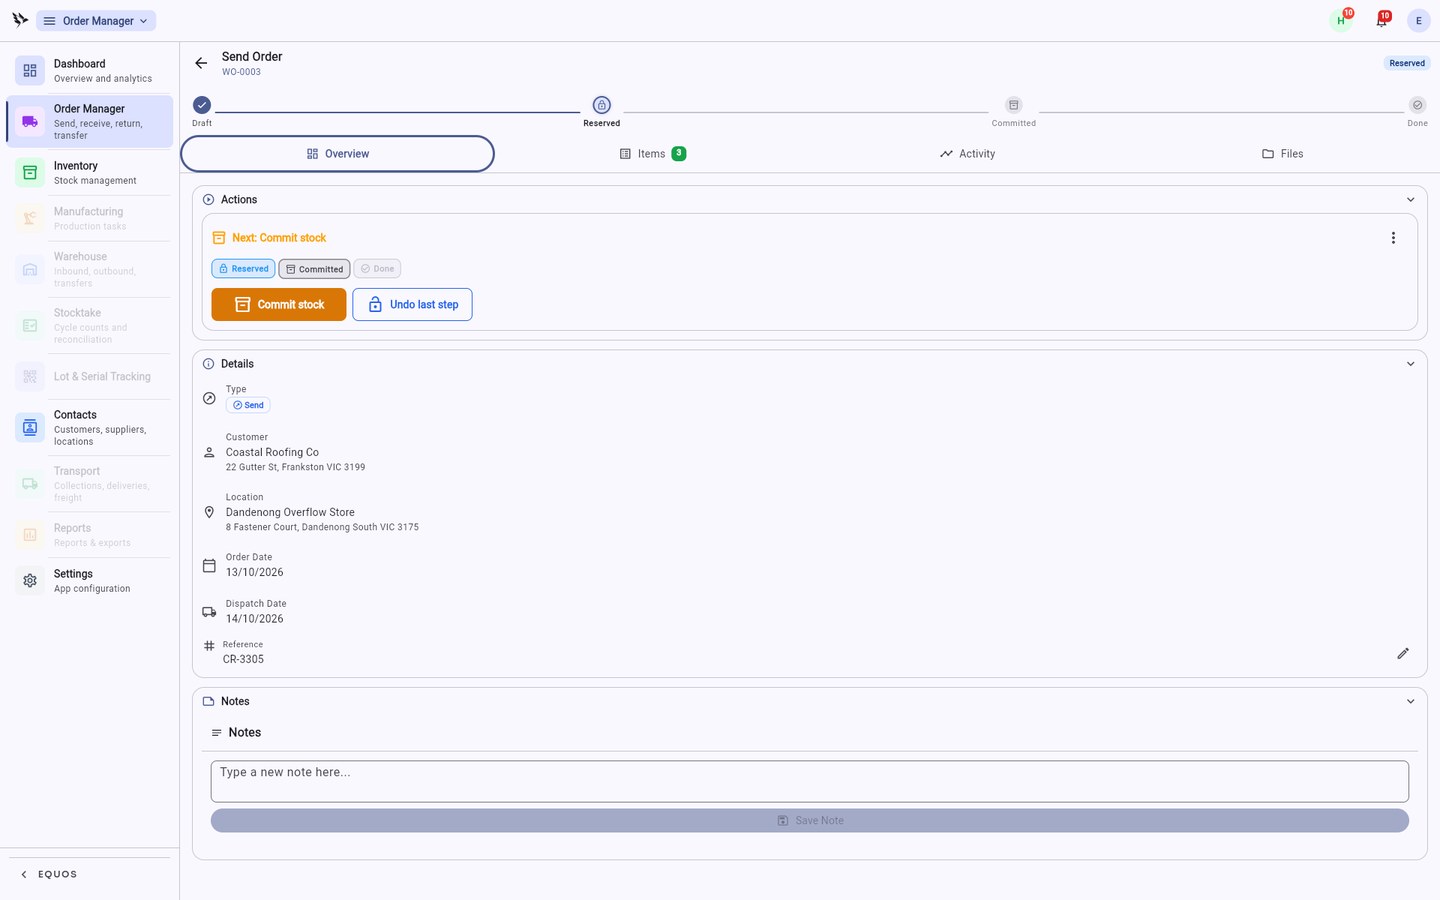 An order detail, showing its lifecycle pipeline and the actions available at the current stage.
- Open an order to see its details, its items, and the "Actions" panel with the next step ready to press.
- The lifecycle pipeline runs from "Finalized" through "Committed", "Fulfilled" and "Completed" — advance the order as each piece of work is done.
- As it moves, the warehouse sees what needs picking, and the details flow on to invoicing. You do not bridge those systems — the handover is already built in.
This allows everyone to get exactly what they need to do their part, and nothing they don't.
Receiving stock
When goods arrive, a Receive order records what came in and reconciles it against what was expected.
- Raise a "Receive" order the same way you raise a Send order, choosing the supplier and the items due.
- For stock landing on the dock, press "Scan Receive" on the dashboard and scan items in against the order. This helps prevent a mismatch between what was ordered and what turned up.
Importing orders
If your orders already live in a spreadsheet, you can bring them in without re-keying a thing.
The importer reads a CSV, maps its columns to order fields, and lets you preview the result before anything is created. Rows that share an order number are grouped into the one order.
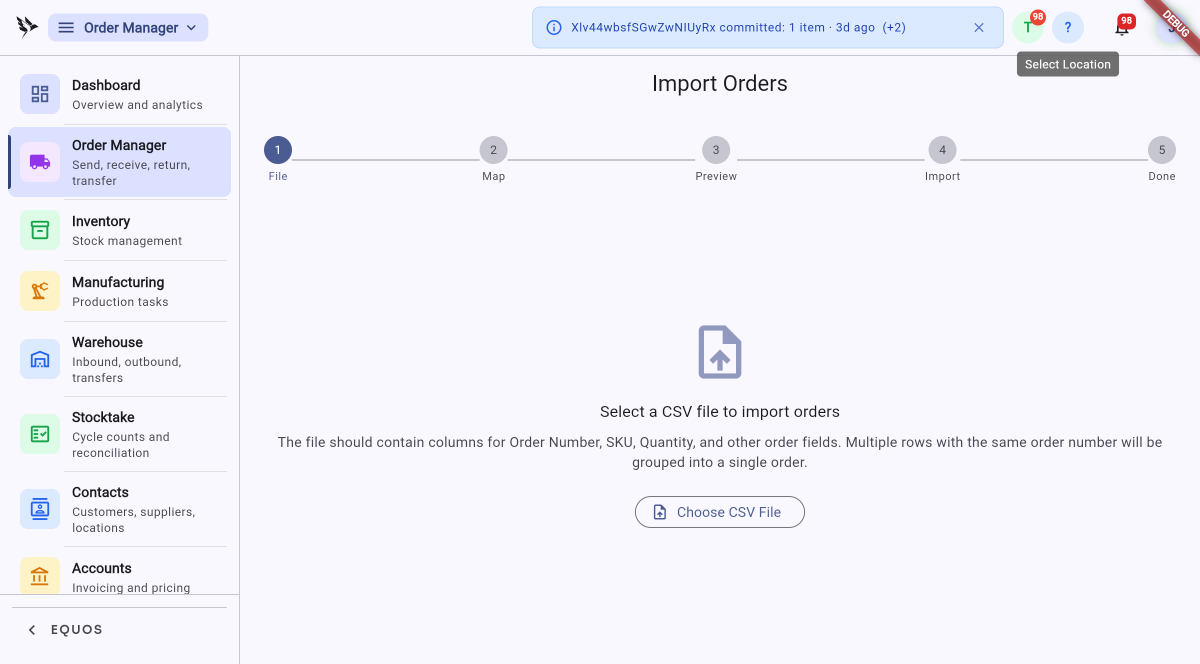 The Import Orders wizard, starting at the file selection step.
- Press "Import Orders" and work through the stepper: "File", "Map", "Preview", "Import", "Done".
- Press "Choose CSV File" and pick your file. It should have columns for order number, SKU and quantity, at a minimum.
- Map your columns, preview the orders that will be created, then run the import.
This easily turns a bulk list into properly tracked orders in a couple of minutes.
Checking quality metrics
For a read on how your orders are performing over time, open "QC Metrics".
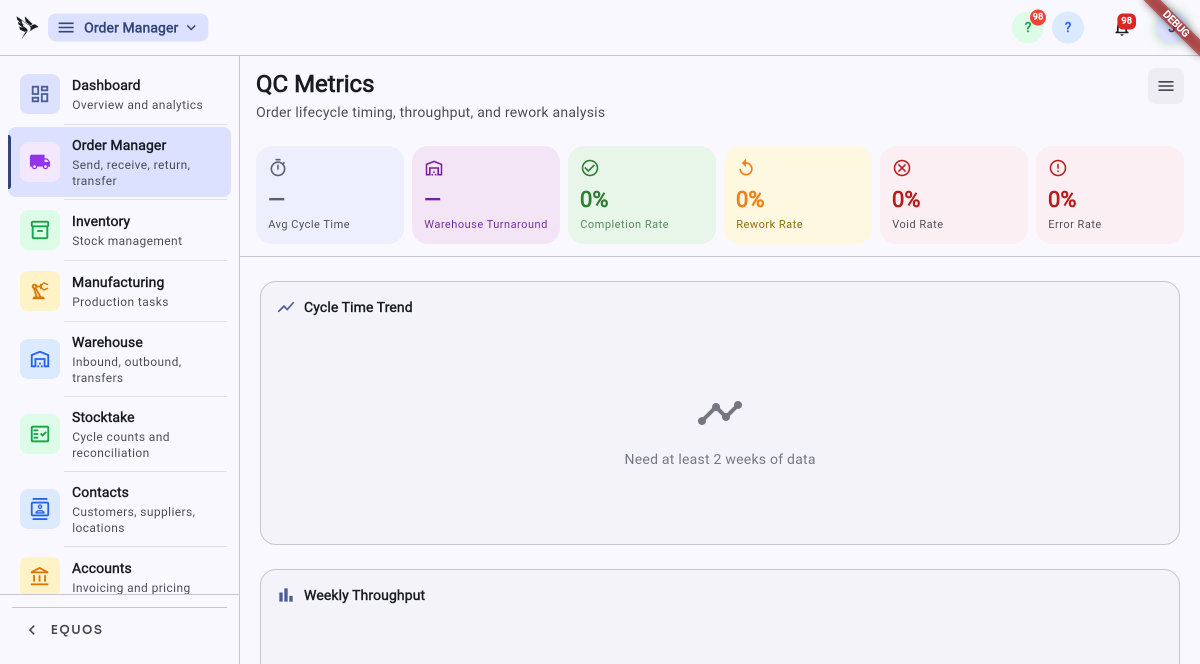 The QC Metrics dashboard, with cycle-time, throughput and rework figures.
- The tiles show your average cycle time, warehouse turnaround, and completion, rework, void and error rates.
- The "Cycle Time Trend" and "Weekly Throughput" charts fill in as your history grows — the trend needs at least two weeks of data before it draws.
This ensures you can spot orders taking too long or reworking too often, and act before it becomes a habit.
Configuring your stages
Your process is yours, so the stages should match how your business actually moves things forward rather than someone else's idea of an order.
- Open your order settings to see the stages an order passes through.
- Skip the stages you don't need, and reorder the ones you keep so they follow your real workflow.
- Save your changes, and every new order follows the shape you set.
This ensures the software fits the way your team already works, instead of forcing your team to work around the software.
Setting up approvals
If your business needs sign-off before an order proceeds, those approvals are built in — nothing moves until the right person says so.
- In your order settings, mark the stage that requires approval.
- Choose who is allowed to give it.
- Save. From then on, an order that reaches that stage waits until an approver signs off before it can continue.
This helps prevent orders slipping through before the right person has seen them.
Archiving and the recycle bin
Once an order is done with, you can move it out of your working list without losing the record.
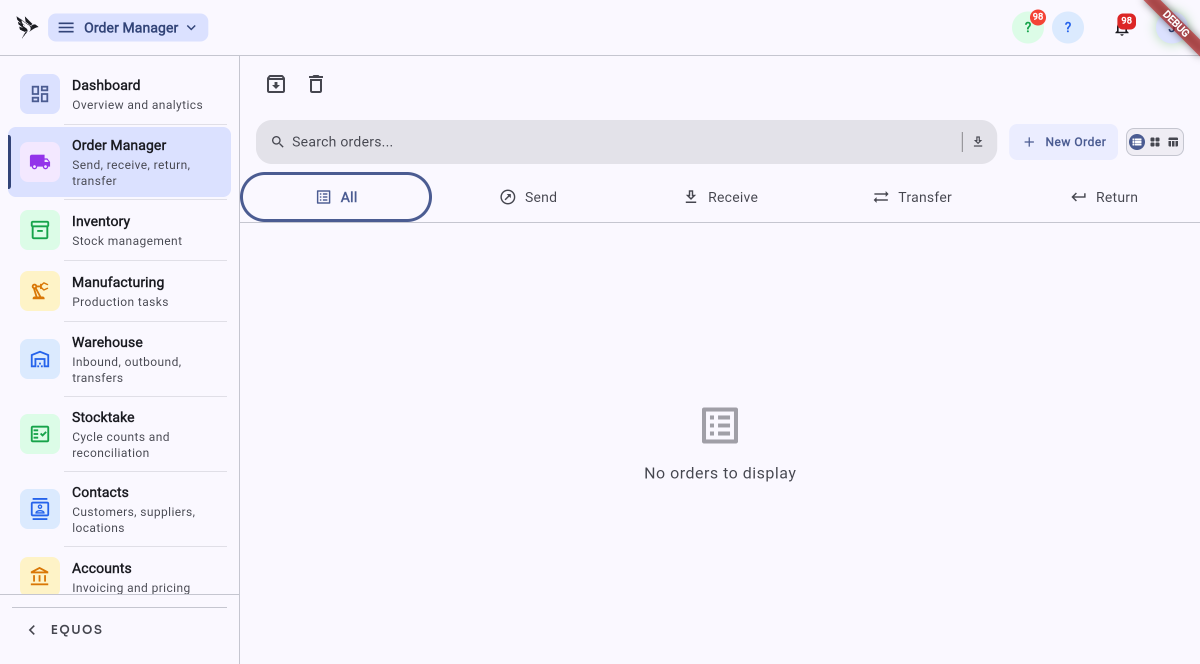 The orders list, with its type tabs and the archive and delete actions in the top-left corner.
- On the orders list, use the archive icon (the box) to send finished orders to "Archived Orders", and the bin icon to move unwanted orders to the "Recycle Bin".
- Open "Archived Orders" to browse everything you have set aside, filtered by type across the "All", "Send", "Receive", "Transfer" and "Returns" tabs.
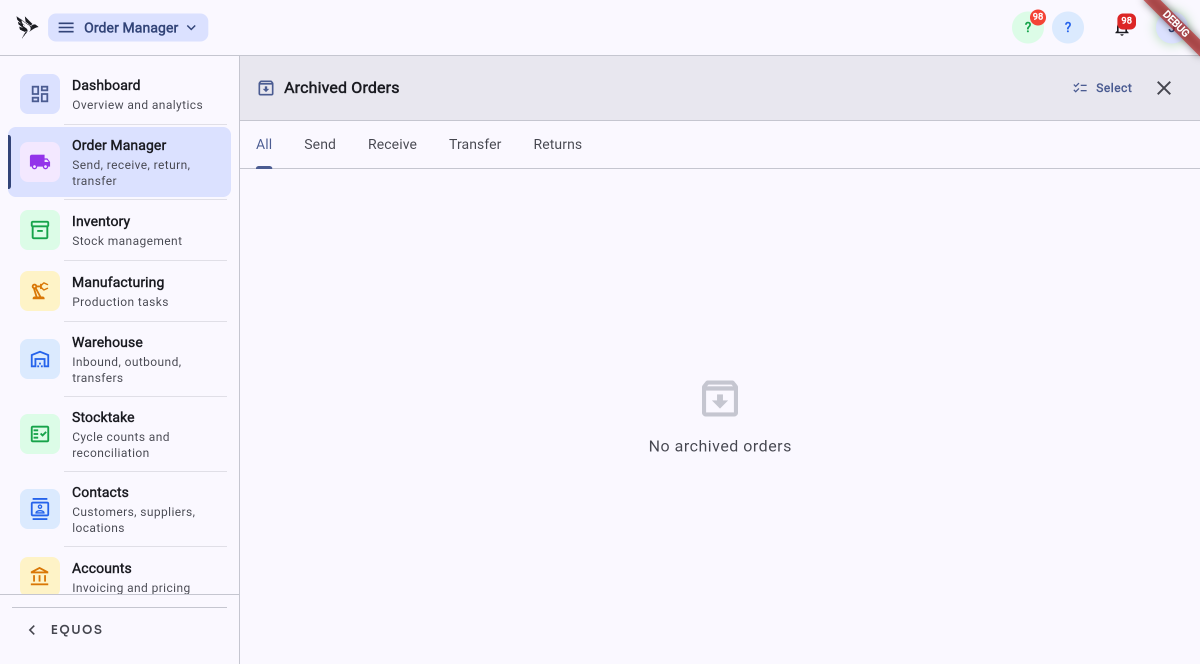 Archived Orders keeps completed jobs out of the way but still on record.
The "Recycle Bin" holds orders you have deleted, so an accidental removal can be put back.
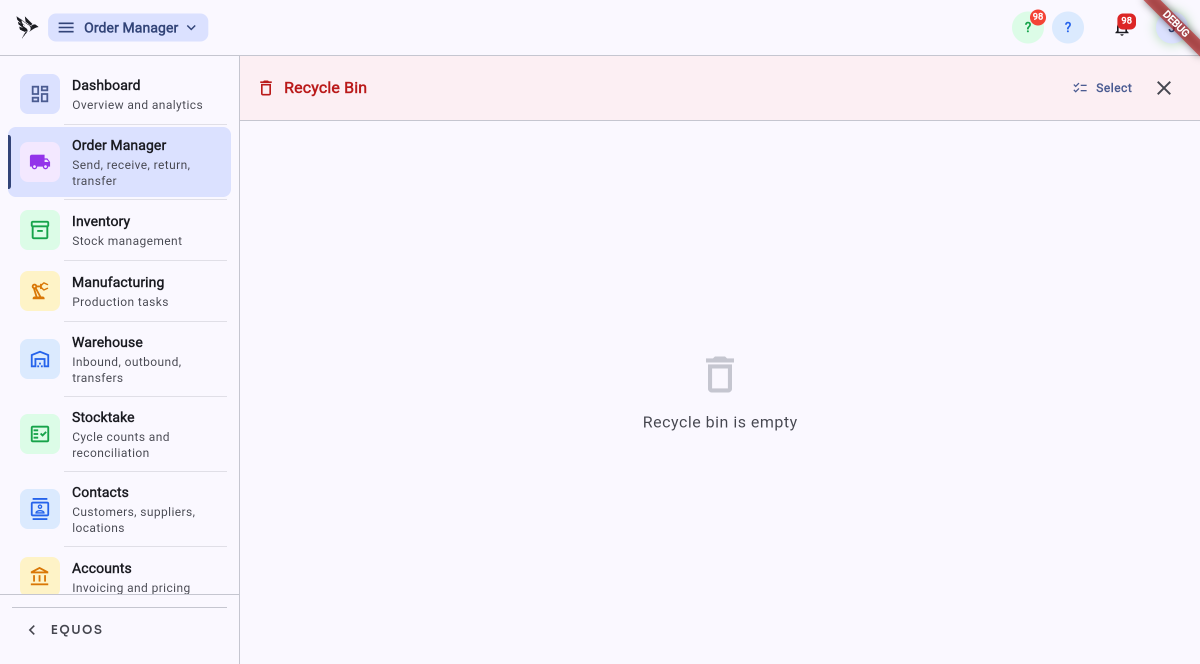 The Recycle Bin holds deleted orders until they are restored or cleared for good.
Emptying the Recycle Bin deletes those orders permanently — they cannot be recovered afterwards. Restore anything you still need before you clear it.
What Orders doesn't do
Orders brings clarity to the jobs your team creates — it does not replace your wider systems.
- It is not an ERP and won't manage your finances.
- It won't place orders for you; the decisions stay with your team.
- It won't forecast demand or predict what you'll sell. It shows you what is happening right now, so you can act on what's real.