📥 Inbound
Inbound is where a delivery becomes stock you can find again — you receive what has arrived against what was expected, then put it away into a bin. This page will guide you through opening an inbound task, receiving goods line by line, assigning bins during putaway, working through several items at once, and completing the receipt.
Opening an inbound task
Every delivery you are expecting shows up as an inbound task. From the warehouse dashboard, simply press "Inbound Tasks" to see the queue, then press "Open" on the task you are working. The task header shows its number and where the goods are coming from and going to — for example, a supplier on the left and your location on the right. This ensures you are always receiving against the right delivery rather than working from memory.
Receiving against what was expected
An inbound task opens on the "Receive" tab, which lists every line that was expected on the delivery. Each line shows the product, its unit of measure, and a progress bar counting what you have received against what was ordered.
- Use the search bar at the top to find a line by SKU, product, batch, or bin, or scan the item to jump straight to it.
- As you count goods in, each line fills towards its expected quantity — a line reading "100 / 100" is fully received, while "0 / 1000" is still outstanding.
- The summary strip keeps a running tally of "Lines", "Quantity", and anything still "In Progress", so you can see at a glance how far through the delivery you are.
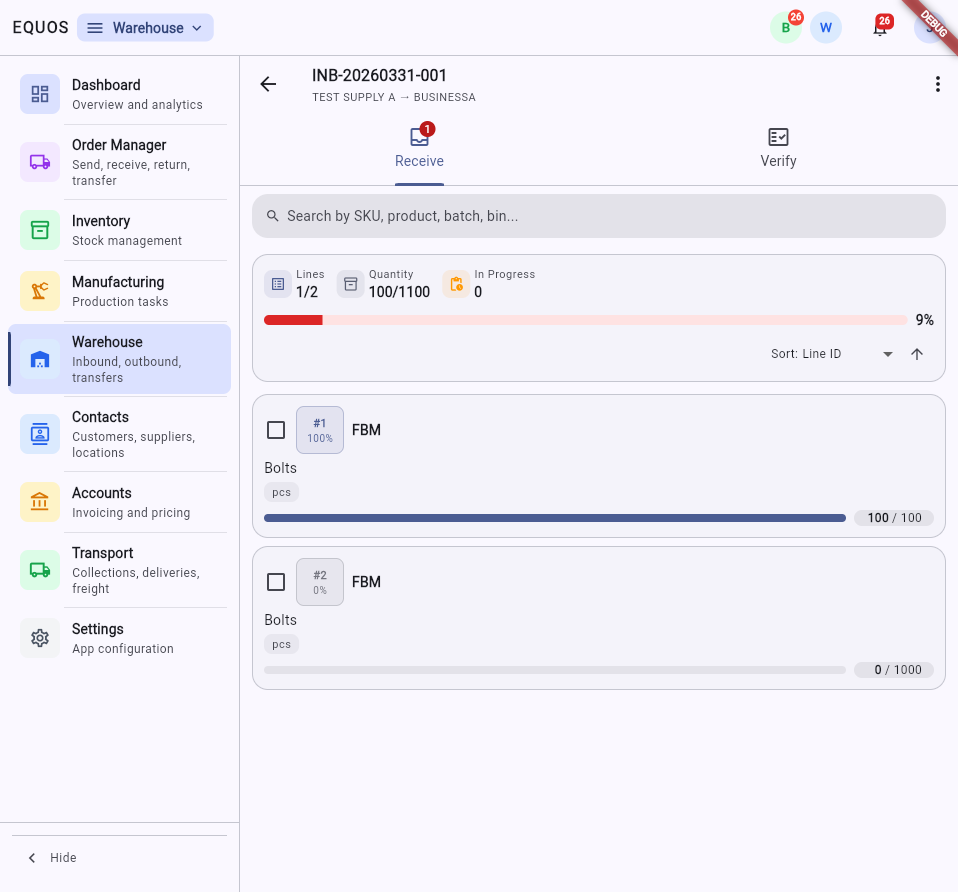 The "Receive" tab: each expected line with a progress bar, and a summary strip tracking lines and quantity received.
If something turns up that wasn't on the delivery, you can discover the unlisted item and add it to the task rather than turning it away. This helps prevent stock that has physically arrived from going unrecorded.
Assigning bins during putaway
Once a line has been received, it needs a home. Select a line and press "Assign Bin" to open the "Assign Bin & Zone" dialog, then choose where the stock should live:
- Pick a "Zone" to narrow down the broad area of the warehouse.
- Choose a "Bin" — this is required, as the bin is the exact spot the stock will sit.
- Press "Assign" to send the item to that address.
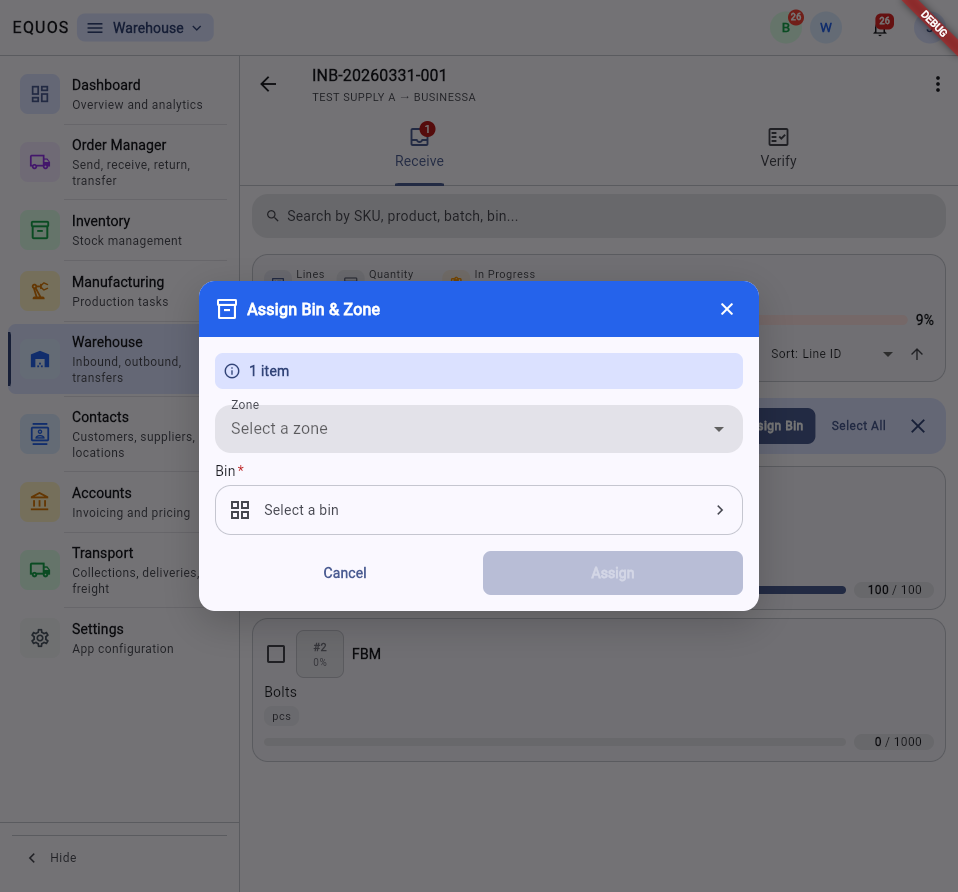 The "Assign Bin & Zone" dialog: choose a zone, then the bin the received item belongs in.
From then on the stock has an address, so when an order later calls for it, picking knows exactly where to walk. If you haven't set your zones and bins up yet, see Storage & Bins.
Putting several items away at once
When a delivery lands multiple lines in the same place, you don't need to assign each one separately. Tick the checkbox on each line you want to move, and a "1 selected" bar appears with an "Assign Bin" button — or press "Select All" to grab every line at once. Assigning a bin then applies to the whole selection, which easily saves repeating the same steps down a long delivery.
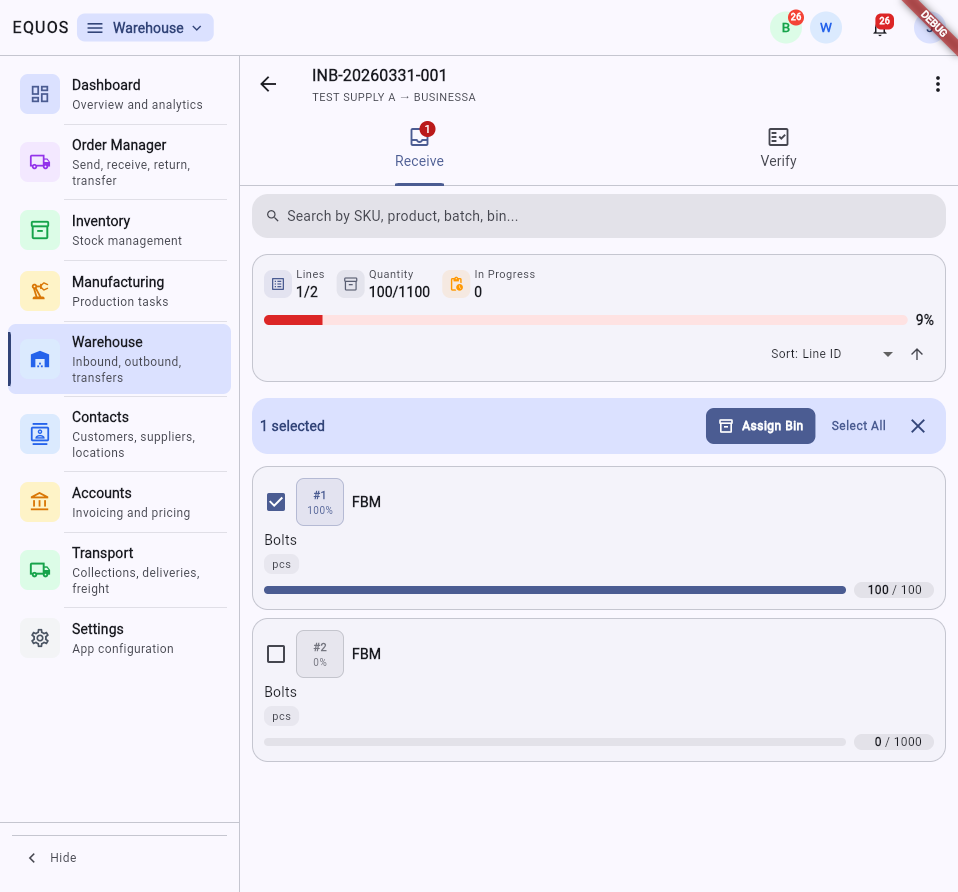 Selecting lines brings up a bulk action bar with "Assign Bin" and "Select All".
Exporting and linking the receipt
The overflow menu — the three-dot icon in the task header — holds a few extra actions for the receipt:
- Export PDF: produce a printable copy of the receiving task.
- Export CSV: pull the received lines out to a spreadsheet.
- Link to Order: tie the inbound task back to the order it belongs to, so the delivery and its paperwork stay together.
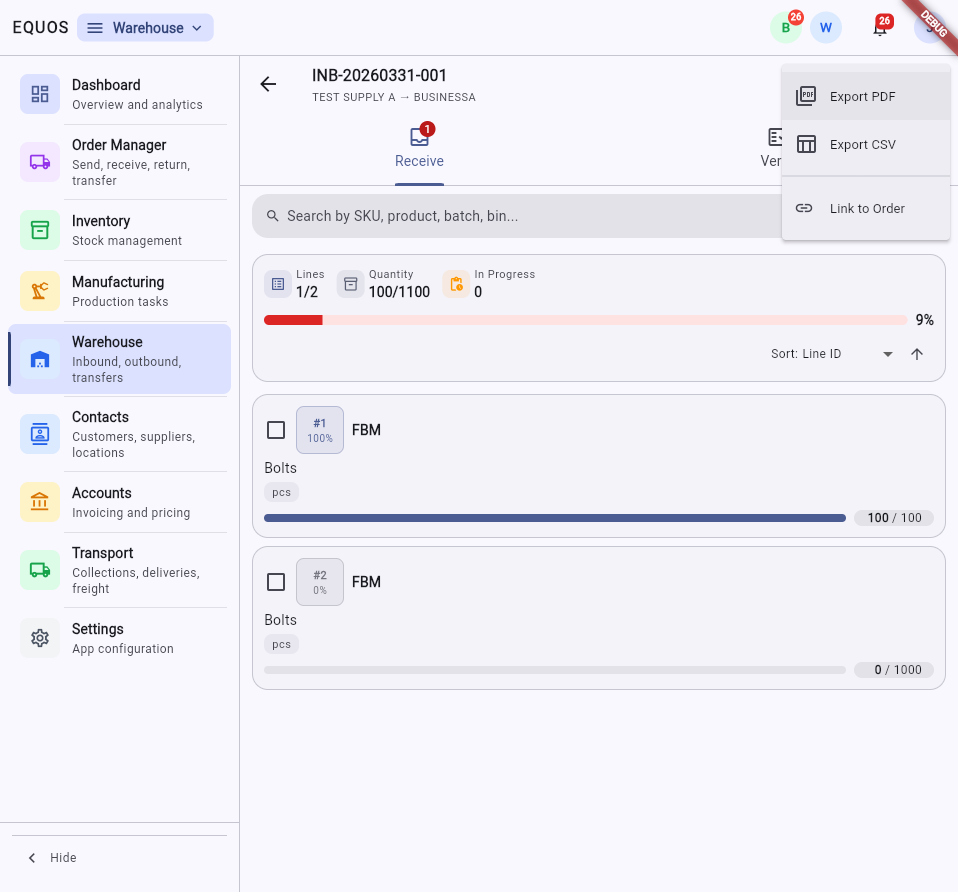 The overflow menu: Export PDF, Export CSV, and Link to Order.
Completing the receipt
When every line has been received and put away, move to the "Verify" tab to check the delivery over before closing it off. Verifying is your last look at what arrived against what was expected, so short or over deliveries are caught here rather than surfacing as a stock error weeks later. Once the task is verified, the stock is live in your warehouse and ready to be picked.