📦 Storage & Bins
Everything in your warehouse has an address. This page will guide you through setting up your zones, locations, and bins, assigning items to them, and how those addresses quietly guide putaway and picking so your team walks to the right spot the first time.
Why addresses matter
An address is simply a name for a place, from the broad to the exact. When every place has one, stock stops being "somewhere out the back" and becomes a location your team can walk to without asking anyone. This ensures that when an order comes through, the pick list can send your team along a real path instead of leaving them to remember where things live.
Defining your storage
You build your storage from the outside in, working from large areas down to the exact spot an item sits.
- Zones: The broad areas of your warehouse — cold store, dry goods, dispatch, and so on. Zones are the first, coarse layer of the address.
- Locations: The aisles, racks, or shelving within a zone. A location narrows things down from "which part of the warehouse" to "which run of shelving".
- Bins: The exact spot an item sits — a single shelf position, a slot, a pallet space. The bin is the last and most precise part of the address.
Set these up before you go live so that every item has somewhere to be put away from day one. You can easily add zones, locations, and bins as your space grows or changes.
Working in the bin manager
You build and manage all of these in the bin manager, the "Storage Manager", reached from the "Storage Manager" button on the warehouse dashboard. It shows your whole warehouse as a tree, with a running count of how many zones and bins you have and a search bar for finding a zone, location, or bin by name.
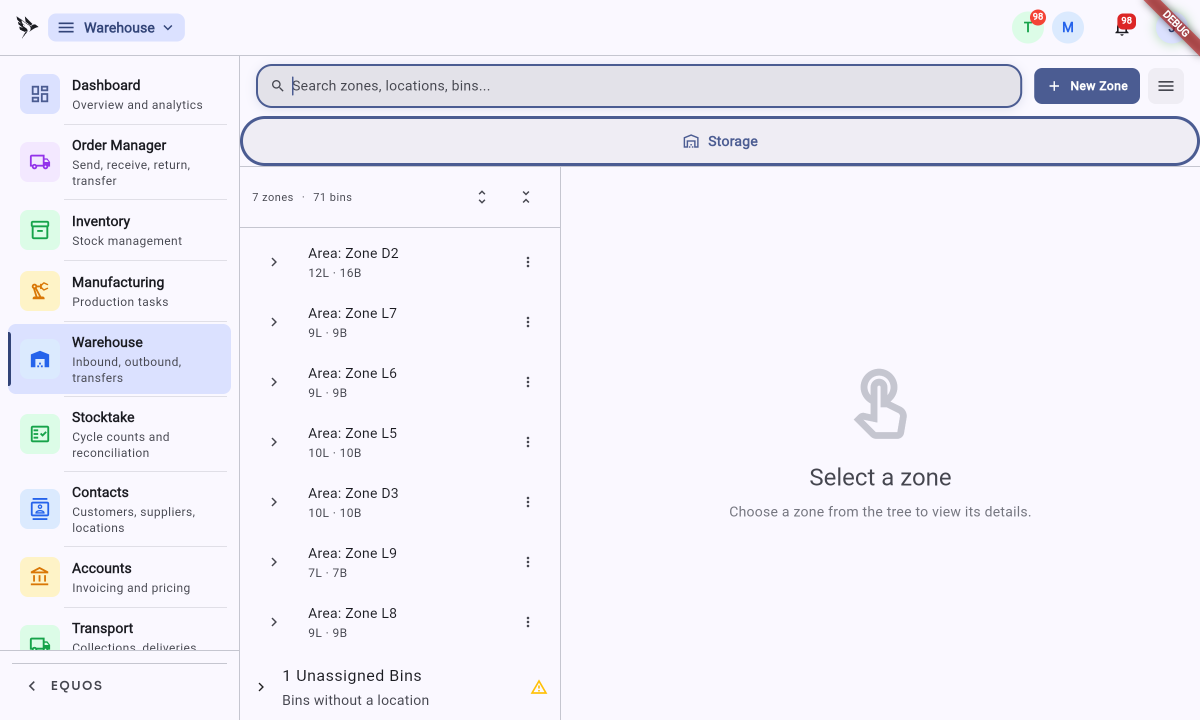 The Storage Manager: your zones down the left as a tree, each showing its location and bin counts, with unassigned bins flagged at the bottom.
- Each zone row shows its tally — for example "12L · 16B" means twelve locations and sixteen bins — and the arrows let you expand a zone to see what sits inside it.
- Any bins that haven't been given a home yet gather under "Unassigned Bins", flagged with a warning so they don't get forgotten.
The bin manager works from the outside in: create a zone, add locations within it, then add the bins that sit in those locations. Select any zone to open its detail pane, where you can add, rename, print labels for, or remove what sits inside.
Creating zones, locations, and bins
- To add a new zone, simply press the "+ New Zone" button at the top and give it a name that matches how your team talks about that part of the warehouse.
- Select a zone to open its detail pane. Here the "Bin Locations" and "Bins" tabs let you see and manage what the zone contains, and tiles across the top count its child zones, locations, and bins.
- Press "+ Add" to create a new bin location within the zone, and add the individual bins that sit in each location the same way.
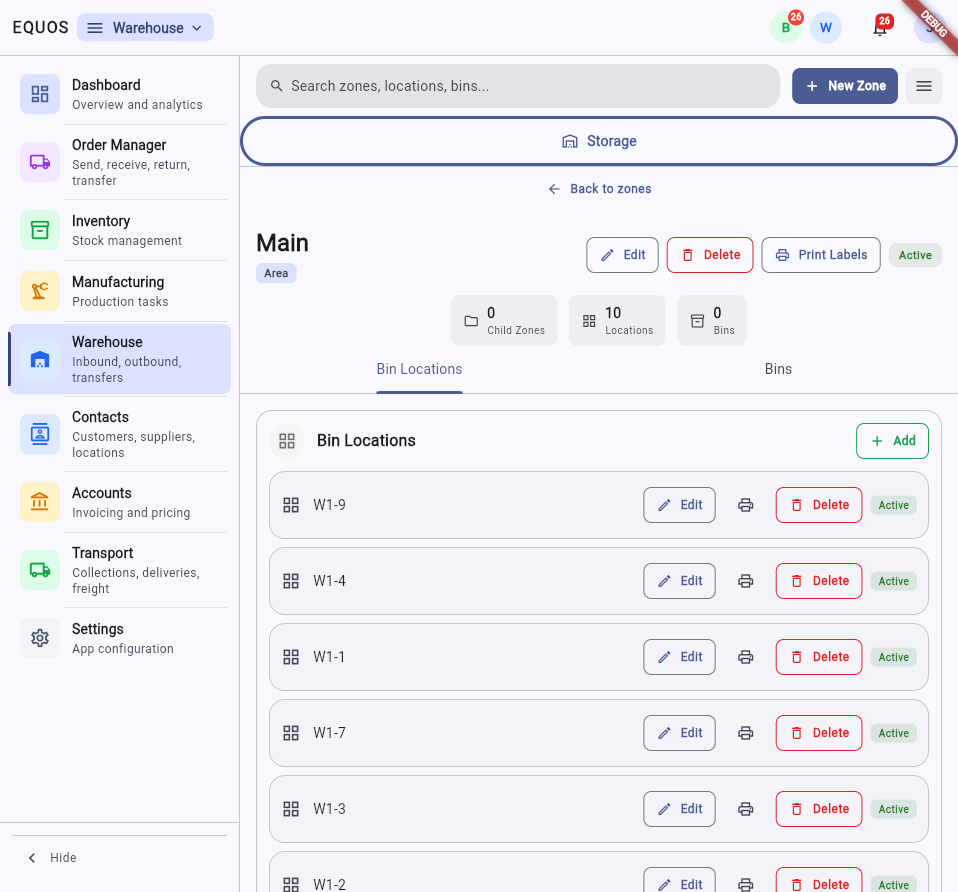 A zone's detail pane: "Bin Locations" and "Bins" tabs, with "Edit", "Print Labels", and "Delete" against each location.
Against each location and bin you'll find an "Edit" button to rename it, a print icon to print its label, and a "Delete" button. Printing labels means the address on the shelf matches the address in the system, so your team can read a bin the same way the app does.
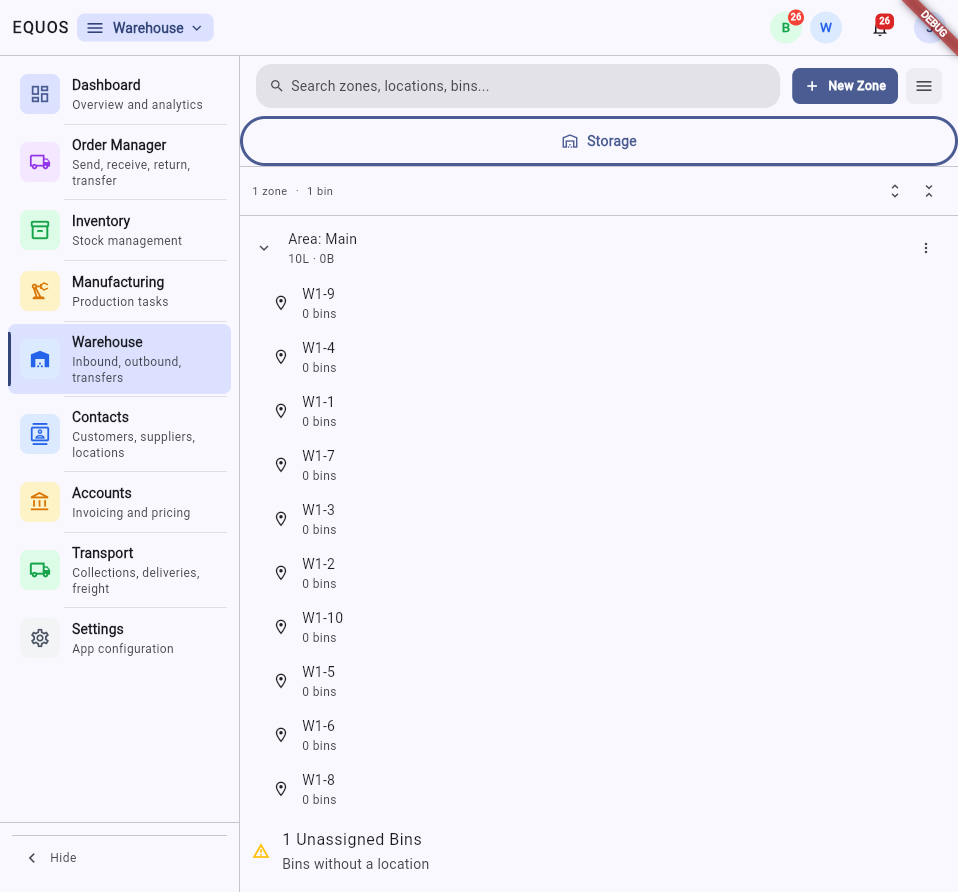 A zone expanded in the tree, showing its bin locations one under the other.
Deleting a zone, location, or bin cannot be undone. Only remove an address once nothing lives there — otherwise the stock that pointed to it is left without a home.
Assigning items to bins
Once your bins exist, you tell the system which items belong where by assigning an item to a bin. From then on, that item has a home. When more of it arrives, putaway knows where it should go; when an order calls for it, picking knows where to find it.
An item can live in more than one bin where that suits your space, and a bin can hold more than one item. The point isn't a rule for its own sake — it's that the system always knows a real place to send your team.
How addressing guides the floor
The addresses do their work quietly, at the two moments it matters most.
- On putaway, when a delivery is received, your team is guided to the bin the item belongs in rather than dropping it on the nearest free shelf. Stock lands where it can be found again.
- On picking, the pick list is sorted by the path through your addressed locations, so your team walks the space once and confirms each item as they reach it.
Get the addresses right and both of these take care of themselves. This helps your team land in the right spot the first time, every time — no wandering, no asking, no wasted steps.
Keep your addresses matching how your team actually talks about the space. If everyone calls an aisle "Rack 4", name the location "Rack 4" — an address only helps if the person walking to it recognises the name.